

Traduzione in Italiano disponibile nei prossimi giorni
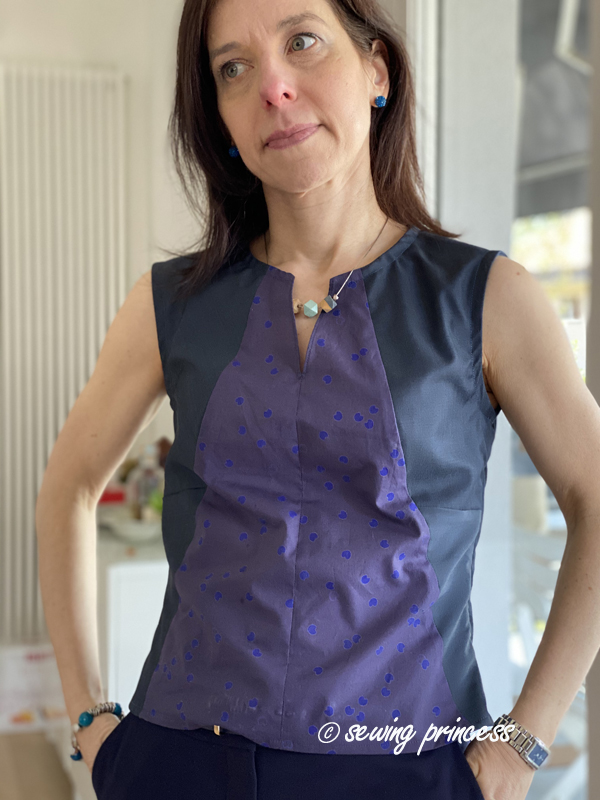
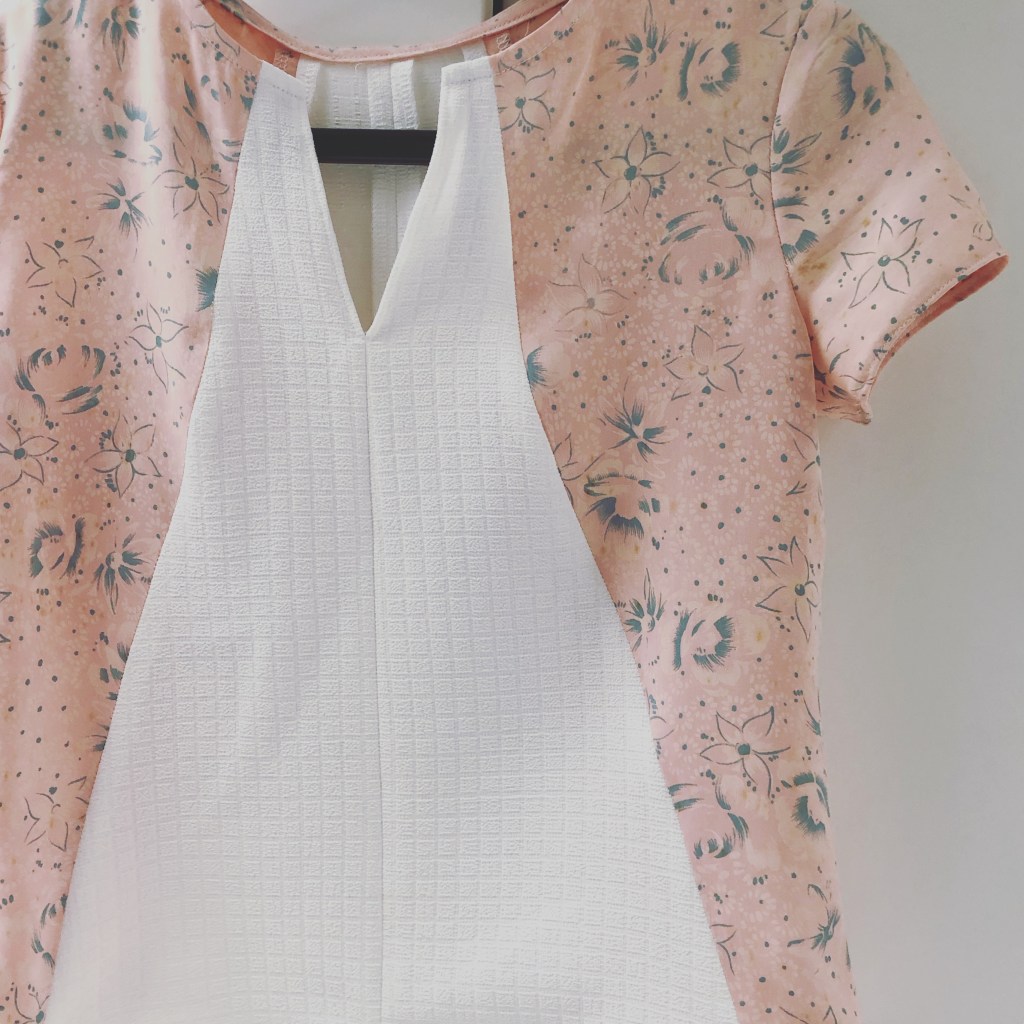
Back in August I posted A birthday top: Fashion style Cosmic Blue Atelier Brunette and offered to write a tutorial. Since then I also made two more versions of this top with short sleeves. You can see one of them below
Some of you replied they would really be interested…so finally I took some time to do it. It will not probably go down in history as the best written tutorial ever but I hope it will be easy enough for you to follow. Note it’s hand-drawn.
Prerequisites:
- To start you need a sleeveless basic top pattern (here I worked with a bust darted one) . Ideally it should be for a woven pattern to get the same end result and drape. However, if you wish to try a similar knit top starting from a knit pattern, you can ;o)
- If your pattern includes seam allowances, remove them. If you’ve never done it before, do it opposite of what explained in this Adding seam allowances tutorial
- Basic knowledge of dart manipulation. If you are unfamiliar with this you could read Dart manipulations basics and Dart manipulation Or one of the countless videos and posts available online
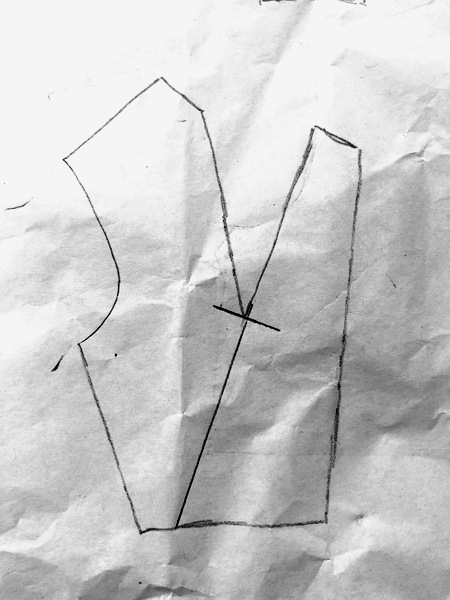
Front:
- Take your basic bodice front

2. Draw a line to the bust point by lenghtening the dart tip 1.5/2cm
3. Draw a line from the bust point to the neckline at an angle. On my pattern the line placement top was 5 cm (2 inches) inward from center front

4. Close bust dart and open the neckline dare. To do this cut your bust dart to (not through) the bust point. Then, cut your neck dart from the neck point to (not through) the bust point. You will form a dart as below. Put a piece of paper below the newly open dart and secure close the bust dart with some tape.
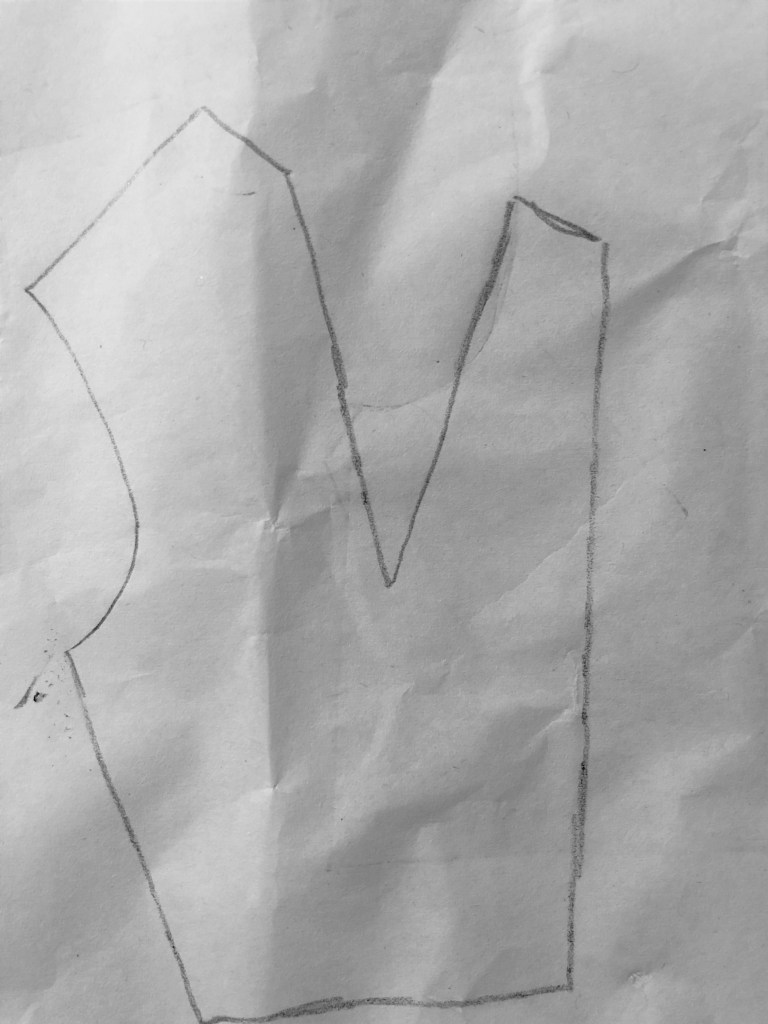
5. Lengthen the inner dart leg towards the side seam (sorry for the slight jog on my drawing, the line should be continuous). On my pattern, the dart placement bottom was 7 cm inward from side front.
6. Add a notch at 90 degree angle to ensure the two pattern pieces match when you sew them back together
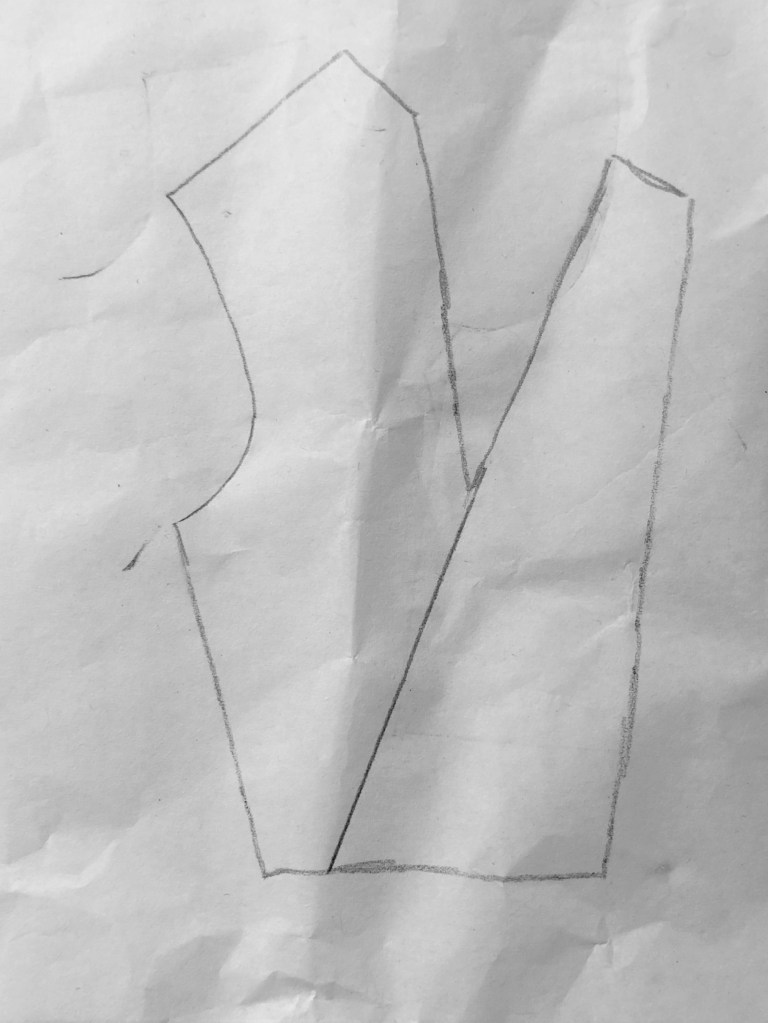
7. Cut the pattern piece in two by cutting through the line you’ve just drawn. Your center part section should look like this. (sorry I forgot to draw the notch you would normally have from step 6)
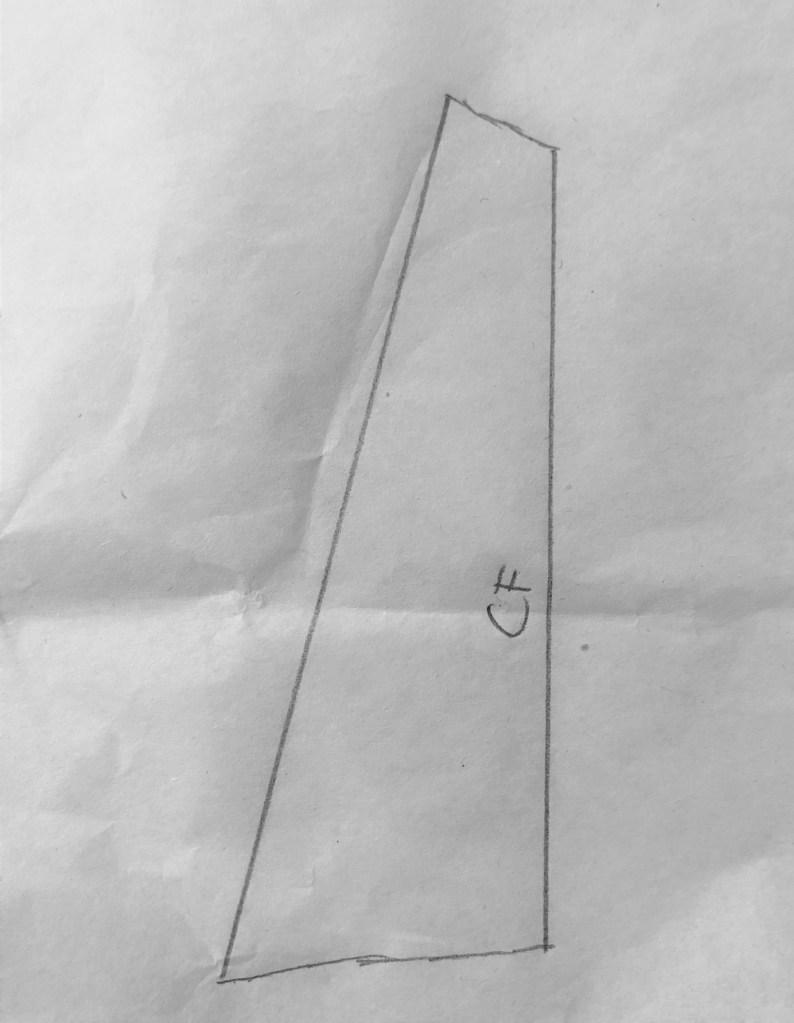
8. Create the neckline opening. On my pattern the line was placed at 3 cm inward from center front. The opening length is 10 cm (you may want to check this on your pattern to avoid it sitting it too low) (sorry I forgot to draw the notch you would normally have from step 6)
9. This is what your bodice front central pattern piece will look like. (sorry I forgot to draw the notch you would normally have from step 6)
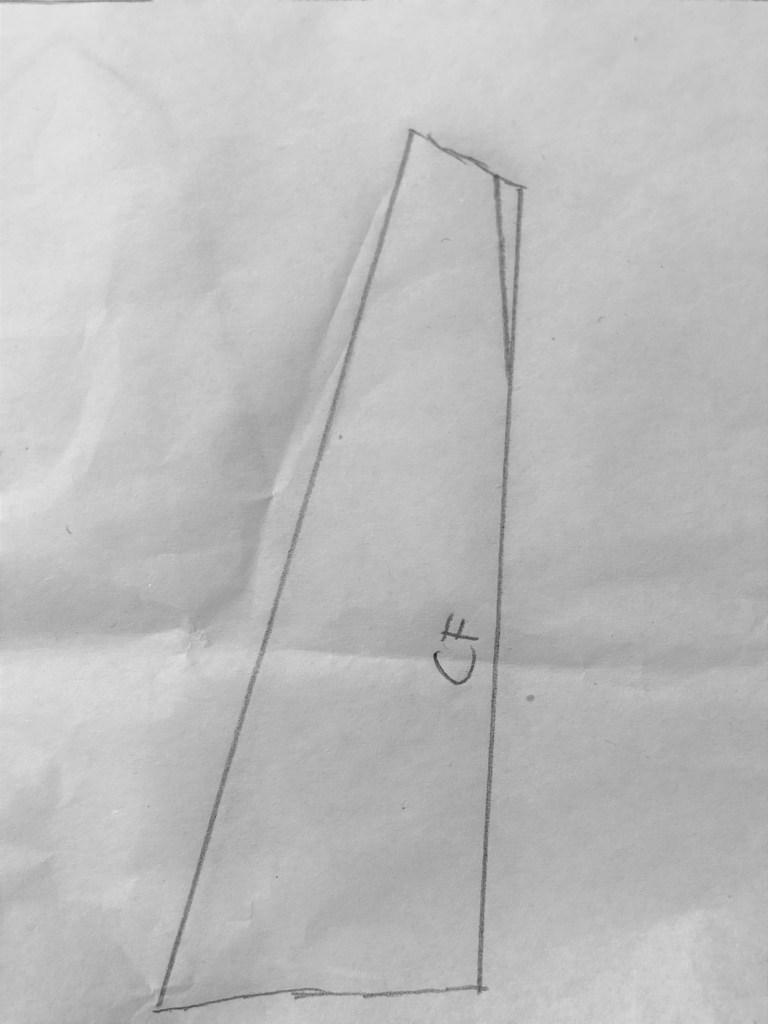
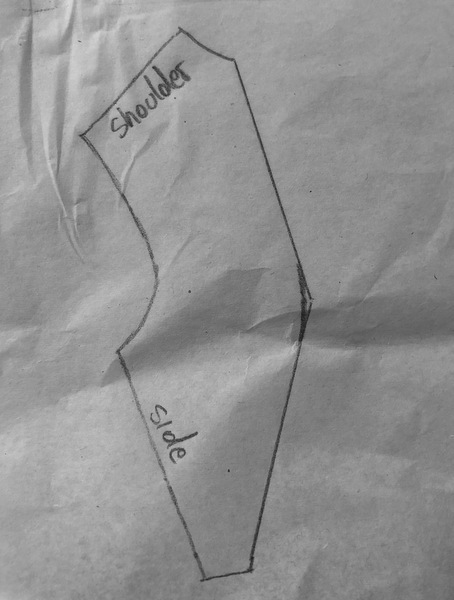
10. Let’s now finalise the second bodice front pattern piece. On Step 5 we had separated the bodice in two parts. This is what your second pattern piece should look like. (sorry I forgot to draw the notch you would normally have from step 6)

11. Draw a subtle curve at the dart point for a smoother looking seam. (sorry I forgot to draw the notch you would normally have from step 6)
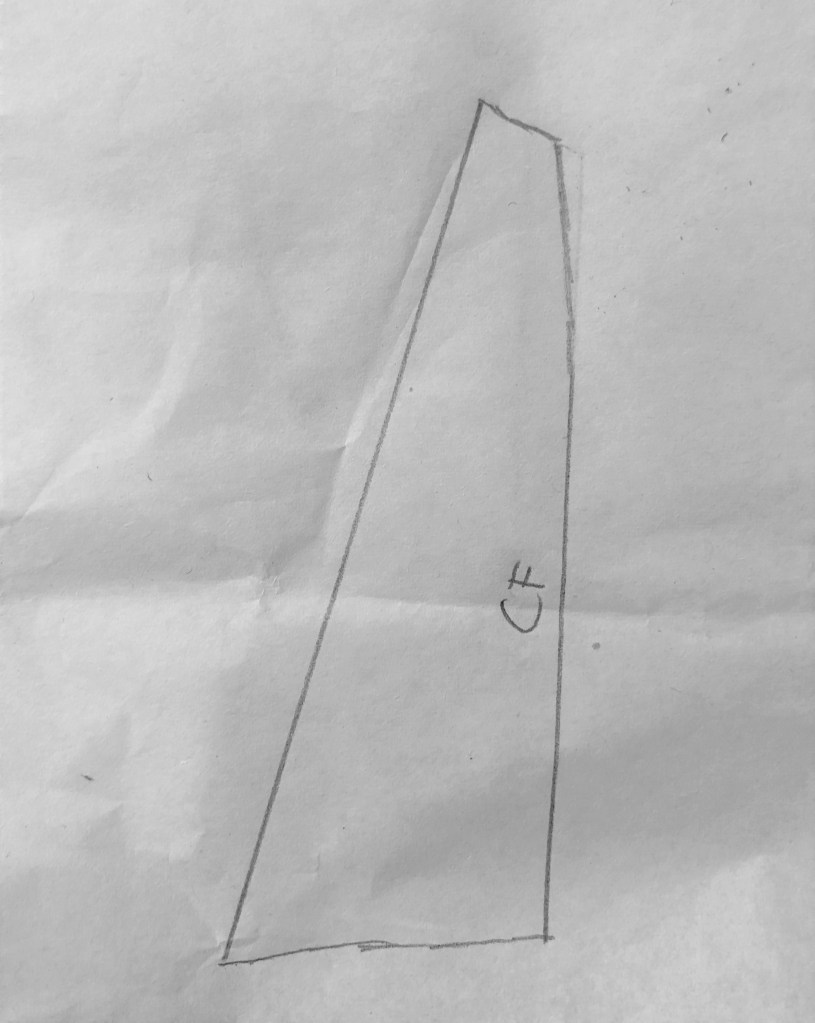
12. Now your two front pattern pieces are ready. Add seam allowances all around.
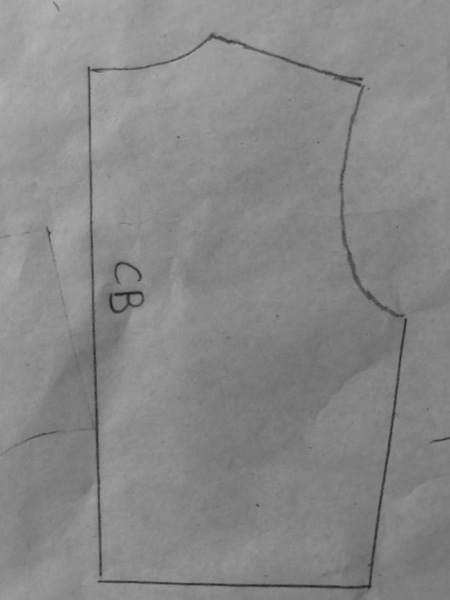
Back:
1. For this tutorial, I started with a dartless back without any center back shaping (it would be cut on fold). However, if your back has shaping it will still work and it would be actually similar to my original Fashion style pattern. If your back has darts you will need to manipulate them in a similar fashion as for the front to get to the end result.
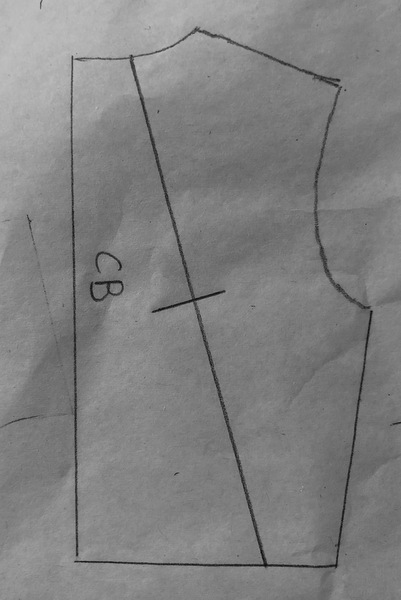
2. Draw a line from the neckline towards the bottom hem, angled towards the sideseam. On my pattern the top point was placed at 4.5 cm inward from center back while the bottom point was at 8 cm inward from side back.

3. Draw your notch.
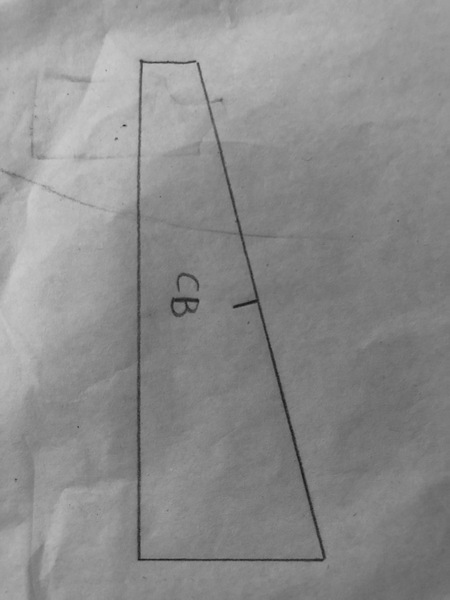
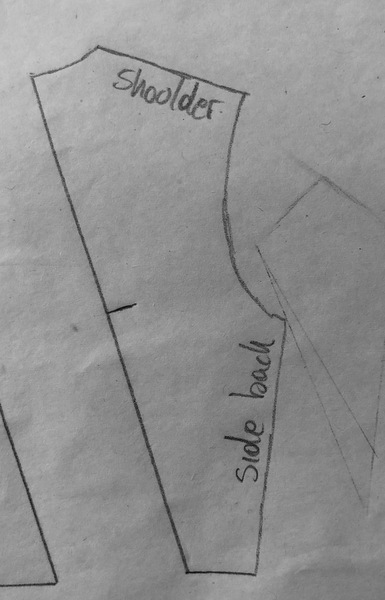
4. Cut through the line you drew at step 2. You will now have 2 back pattern pieces. Below is your back central pattern piece.
5. And this is your back side pattern piece
6. Add your seam allowances to all back pieces. If you Centre Back is cut on fold you don’t need to add the seam allowance on that line.
I hope this is helpful for you. If you have any questions let me know. And if you make this pattern, let me know and tag me on social media with #sewingprincessfashionstyletop and @silviasewingprincess
I look forward to seeing your creations
