

Thanks so much for the feedback you gave me back in January on fabric choice for the collar and cuffs. After long debating…I took my grown-up decision and cut into my precious fabric 😉 Sometimes it’s easier to decide to move country than choosing the right fabric, eh? And a great thank you to Carolyn who introduced me to shot cotton.
Avevate indovinato??? Grazie mille per i consigli che mi avete dato a gennaio sulla scelta della stoffa per il collo e polsini. Dopo aver dubitato a lungo…ho preso la decisione come una persona adulta e ho tagliato la mia preziosa stoffa 😉 A volte e’ piu’ facile decidere di cambiare paese che scegliere la stoffa adatta, no? E ovviamente un grazie enorme a Carolyn che mi ha fatto scoprire questo cotone cangiante.

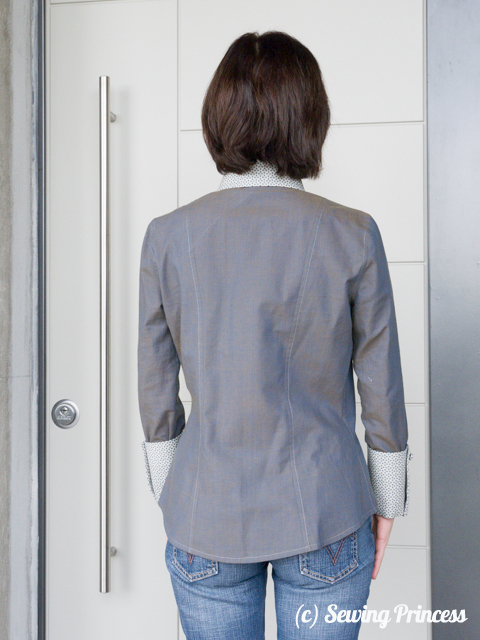
I was pretending to mimic the November La Mia Boutique Cover I have clearly a long way to go.
Let’s get down to the pattern details!
Cercavo di imitare la copertina de La mia boutique di novembre. Chiaramente ho molta strada da fare.
Ma vediamo i dettagli del modello!
- I chose a size 42 (similar to Burda 38). Unlike Big 4 patterns, it fits true to size.
- I moved front and back princess seams by nearly 2 inches
- Did the usual forward shoulder adjustment
- That’s it! The sleeves fit extremely comfortably. The armscye is perfect. I close fit as I like it.
- I added flat felled seams everywhere!
- I think I found the perfect shirt pattern!
- Ho usato la taglia 42. Mi va perfetta. E le misure corrispondo a quanto indicato sulle taglie La mia boutique.
- Ho dovuto spostare le cuciture centrali di 2 cm per farle cadere al centro seno.
- Ho modificato la cucitura spalla e manica come al solito per colpa delle spalle un po’ curve
- E basta! Le maniche hanno una vestibilita’ fantastica e anche il giro manica e’ al punto giusto. Avvitato come piace a me.
- E poi ho fatto le cuciture classiche da camicia!
- Credo proprio di aver trovato il modello perfetto per le camicie!

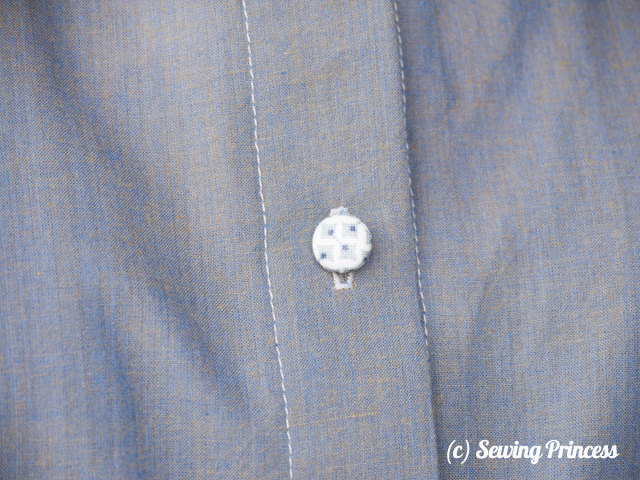
I interfaced the cuffs on both sides. And made my own buttons! Once again I bought them on Etsy I will have to get some more. I want to add two more on each side. What do you think?
Ho intelettato i polsini da entrambi i lati e ho fatto i bottoni. Li ho comprati di nuovo su Etsy da Mad about pink Pero’ ne devo comprare degli altri perche’ ne vorrei aggiungere altri due su ogni lato. Che ne dite?

So proud of my collar! Also interfaced both sides. I think the collar should have been slightly smaller.
Sono davvero soddisfatta del colletto. Ho intelettato entrambe le parti. In realta’ credo che il collo sia troppo grande. La prossima volta lo stringero’.
Create a Classic Tailored Shirt with Pam Howard: Short Review

This shirt would have never been possible without Pam Howard’s Craftsy class: Classic Tailored Shirt
When I started watching the class I was a bit puzzled by her slow and calm pace. It felt boring.
But as the class progressed I appreciated her precise and calm approach. She does walk you through all the steps of a shirt construction. For example she explains how to create flat-felled seams in the sleeves with your regular presser foot…something that without her instructions can end up in a mess! I must say I used my edgestitch foot for that which for me makes things a lot easier
The class does not cover fitting, so I wouldn’t take it for that.
If you would like any further feedback on this course, don’t hesitate to ask.
By the way, if you use the links on this page you should get a discounted price* for the class. Hopefully it will work for you too.
Create una camicia classica con Pam Howard: Breve recensione
Non sarei mai riuscita a fare la camicia senza il corso su Craftsy con Pam Howard: Classic Tailored Shirt. Adesso e’ disponibile anche con sottotitoli in inglese che dovrebbero in parte facilitare la comprensione. Chissa’ magari un giorno metteranno i sottotitoli in italiano e altre lingue.
Appena ho cominciato le lezioni avevo qualche dubbio sull’insegnante. Era molto lenta e calma. Mi sembrava noioso.
Man mano che continuavo a seguirlo ho apprezzato la precisione e la calma. Ti spiega davvero tutte le fasi passo passo. Ad esempio spiega come creare le cuciture ribattute classiche da camicia (non so il termine giusto) con il piedino normale…una cosa che senza le sue istruzioni puo’ risultare impossibile! Devo dire che per la camicia ho usato il piedino per bordi stretti e impunture che mi facilita il lavoro.
La lezione non tratta le modifiche al modello per vestibilita’. Quindi se vi interessa questo aspetto non sceglierei questo corso.
Se avete domande sul corso, chiedetemi pure.
Ah, se cliccate sui link di questa pagina dovreste avere uno sconto*. Spero funzioni.

Do you have any shirt-making plans soon? What is your favorite pattern?
Don’t forget: You have one more day to enter the La mia boutique giveaway
Pensate di cimentarvi con delle camicie? Qual e’ il vostro modello preferito?
Non dimenticate: Avete ancora un giorno per vincere una copia de La mia boutique
*I will get a small bonus but this has no impact on the price you pay. I regularly paid for the course*
*Se comprate il corso, mi daranno un piccolo bonus ma questo non ha ripercussioni sul prezzo finale. Io ho pagato regolarmente il corso.*

I love this! The print against the shot solid looks wonderful.
LikeLike
Wonderful! Great garment! Good choice 🙂
LikeLike
Silvia, that shirt is beautiful! I love shot cottons, I love princess seams and I love flat-felled seams, so this shirt is close to shirt perfection for me. (:
Whenever I overcome my fear of button holes, I’ll have to look into a princess-seamed shirt pattern!
I must admit that I wasn’t so sure when I sew the LMB styling of that pattern, so I really admire your ability to look past that!
LikeLike
Wonderful. I am glad you liked the class. I have purchased it too but haven’t started it yet.
LikeLike
Qué pasada Silvia!!! Te quedo super bien, menudos detalles más chulos tiene la camiseta, la tela en contraste le queda muy bien. Besos guapa!
LikeLike
Direi che è valsa l’attesa, questa camicia! Personalmente non amo i polsini così grandi, ma a te stanno benissimo! Ottimo lavoro 😀
LikeLike
Absolutely stunning – love the fabric and buttons too!
LikeLike
Bello … bel drappeggio sulla schiena !!! …. 🙂
LikeLike
Fantastic shirt! I love the fabric you chose for the collar, cuffs and buttons. I want to make my own buttons too!
LikeLike
Silvia it looks great, and why am I not surprised that it is gray? 😉 I like your idea of adding more buttons to the sides of the cuffs. As for the collar, maybe it looks a bit large to you because of the contrasting fabric? Personally I think it looks great and I’m so glad you have found the perfect fit for a button down shirt. I’m curious about the fact that you moved the princess seams. Is this because you wanted them to hit at a different spot or was it to fix a fit issue? The only shirt I’ve made with princess seams was the Pendrell blouse so I’m not too familiar with how they should fit. Finally, thanks for the discount on the Craftsy class!
LikeLike
Silvia, además de tener los ojos más bonitos de la blogosfera,tienes una manos para la costura que estoy con la boca abierta. Que camisa, que preciosidad! Es sencilla pero con los detalles que la hacen única…
Me voy a tener que apuntar al curso ese de crafsty! Estoy ahora con uno para hacer patrones de falda, pero voy muy lenta porque el tiempo no me da de sí
Besitos
LikeLike
I really like this – lovely fabric and colour choices. Ya know, the collar is balanced rather nicely by the cuffs so I don’t think its too big at all :). Oh and the buttons are perfect too.
LikeLike
It looks lovely, Silvia, I really like your contrast fabric together with the shot cotton. 🙂 And those self-covered buttons are so nice!
LikeLike
Oh! This is your perfect shirt pattern, most definitely. It fits like a dream! The shot cotton is glorious and the contrast fabric is the perfect choice. I love it!
LikeLike
Silvia,
è fantastica!!!!!!!!!!!!!!!!!!!!!!!!!!!!!!!!!!!
LikeLike
Very well done! I wish I were motivated to sew right now as this would be a perfect project. Beautiful photos of you, too, Silvia!
LikeLike
So cute!!
LikeLike