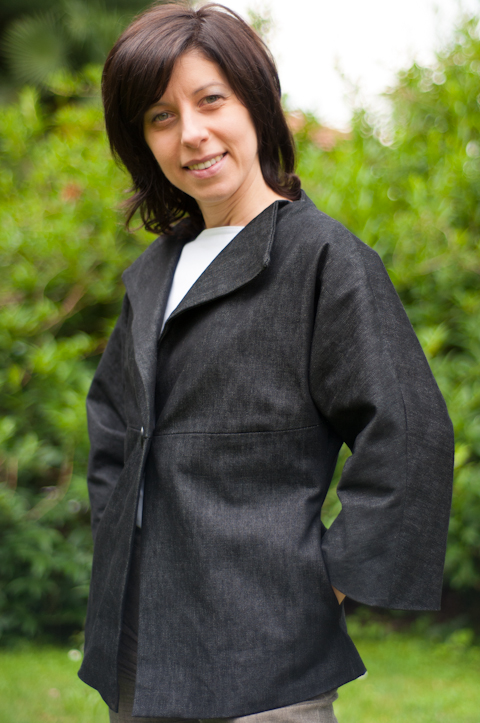
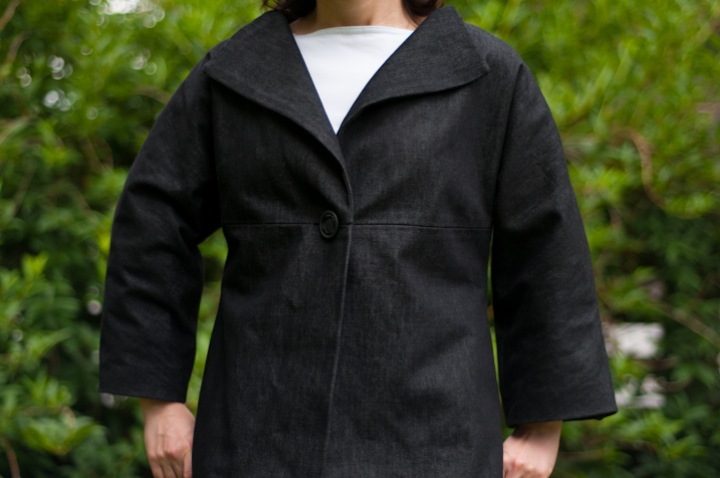
 I really feel I am wearing a unique garment when I have my new Unique Jacket by Paco Peralta on. Does this happen to you when you wear an handmade garment that you managed to alter to fit your body and didn’t mess up (!)?
You may remember I bought this pattern at the end of 2011 and thanks to the post I managed to receive it. I had been eying this pattern for ages so I am really happy I was finally able to make it.
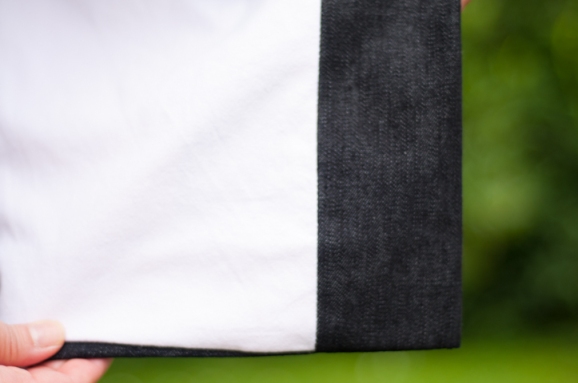
All materials come from my stash: the denim fabric is the same as for my first jeans, the lining is part of an old sheet and the button is an extra one I had originally bought for my 60’s style Michele coat. Can you tell I am also proud I didn’t go out and buy more fabric?
Now for some details: although the pattern doesn’t come with instructions, you can find all the information you need on Paco’s blog.
In terms of alterations I made a few. First of all, the jacket doesn’t have any seams at the center back…the problem is that with denim and my curved back (or bottom sticking out!) it looked huge on me. So, little by little I added a 2.5 inches (3 cm) curved dart on each side of the center back going from the neckline to the bottom and tapering to zero. This allowed me to get a more fitted jacket.
Mi sembra davvero di indossare un capo unico quando indosso la Giacca Unica di Paco Peralta Capita anche a voi quando indossate un capo che siete riuscite a modificare per la vostra corporatura…senza fare danni (!)?
Forse ricorderete che ho comprato il modello a fine 2011 e sono riuscita per miracolo a riceverlo. Volevo cucire questa giacca dal momento in cui l’ho vista e sono contenta di avercela fatta.
Tutti i materiali usati erano gia’ in mio possesso: il tessuto jeans e’ lo stesso dei miei jeans, la fodera era un vecchio lenzuolo e il bottone uno di quelli comprati per il cappotto anni 60 modello Michele. Si capisce che sono davvero contenta di non aver comprato altra stoffa?
Veniamo ora ai dettagli: non ci sono istruzioni nel modello, ma le informazioni sono disponibili sul blog di Paco.
Per quanto riguarda le modifiche, ne ho fatte un po’. Prima di tutto la giacca non ha cuciture nel centro dietro, come spesso succede…il problema e’ che con la stoffa di jeans e la mia schiena incurvata (o il sedere che esce fuori!) era enorme. Quindi pian piano ho aggiunto una pince curva di 3 cm che va dal collo alla parte inferiore. Cosi’ sono riuscita ad avere un modello piu’ avvitato.
The following alteration was taking in 3/8 inch (1 cm) at the sides…again for a more fitted look. Now I know Paco suggests to grade it differently to preserve the style… And he even covered alterations in a very detailed post…but this jacket was my make it or break it muslin and finished garment…so I couldn’t cut it at the shoulder line after tracing it. So…I suggest you read Paco’s instructions and make a muslin ideally!
Poi ho stretto 1cm per lato sempre per rendere il modello avvitato. So che Paco spiega di fare questa modifica in modo diverso per mantenere la linea della giacca…e ha anche spiegato tutte le modifiche in dettaglio…ma non ho fatto il modello di prova e non potevo quindi tagliare la giacca sulla linea della spalla. Quindi vi consiglio di leggere le istruzioni e in teoria di fare un modello di prova!
Next up was the sleeve width…since I chose denim for the jacket or simply because I am short the sleeves looked to wide… there again I went and took off 3/8 inch (1 cm) all the way from the top and the bottom seams. Note this will also raise the jacket…so make sure it doesn’t shift the waist and bust line too much on you.
Prossimo passo, la larghezza delle spalle. Con il tessuto di jeans mi sembravano larghe cosi’ ho tolto 1 cm in alto e in basso. Notare che cosi’ facendo si alza il punto vita e seno…controllate che non sia troppo per voi.
If you notice the lining peeking from the sleeve, I would like to take full blame for that…Paco has foreseen a 2 inch seam allowance to take up the sleeve and attach it to the lining. But I ran out of fabric and was too lazy to patch it up with an additional bias strip…as I should have!
Se notate la fodera che esce fuori dalla manica…e’ colpa mia. Paco ha previsto 5 cm di orlo per attacare il risvolto alla fodera…ma io non avevo abbastanza stoffa e non avevo voglia di cucire una striscia di sbieco aggiuntiva…come avrei dovuto fare!
I love how the corner comes out so sharp and the lining comes up from the corner diagonally! This has to do with how well Paco drafted the jacket more than to my skills! The design in this case does make a difference! I used the bagging out tutorial as in the Michele 60s style coat.
Some more construction details: when assembling I hadn’t thought of was sewing the lapel lining right at the start and reinforcing the armhole seam. Thankfully Tany wrote a detailed tutorial
Ah, and if you don’t like making buttonholes…this is the right project…they are in the seam…so you simply don’t sew that part and then stitch by hand the lining part to the main fabric. Easier done that explained…
Adoro l’angolo netto che si crea sulla parte inferiore e la fodera che segue una linea diagonale verso la parte posteriore. Questo e’ tutto merito del modello. Come e’ disegnato fa la differenza! Ho usato le stesse spiegazioni del cappotto anni 60 modello Michele per attaccare la fodera completamente a macchina.
Ah, e se non vi piace fare le asole questo modello fa per voi. L’asola e’ creata non cucendo quella parte e unendo con dei punti a mano il risvolto alla parte esterna. Piu’ facile a farsi che a spiegarsi.
I borrowed Tany’s idea and put both Paco’s and my label on the jacket…his quality is much better than mine though!
Ho copiato l’idea di Tany e ho aggiunto la mia etichetta a quella di Paco…la qualita’ della sua e’ nettamente superiore!

How long did the whole process take? One week…which for my standards is great…I can only dedicate evenings to sewing during the week and I am terribly slow!
Have I tempted you to make a jacket? If you never dared…can I ask why?
Quanto ci ho messo a cucire la giacca? Una settimana…che per la mia media e’ fantastico…in settimana cucio solo la sera e sono super lenta!
E’ venuta anche a voi la voglia di cucire una giacca? Se non ci avete mai provato posso chiedervi il motivo?


Oh Silvia, this is so elegant! You’ve done a beautiful job with the construction, and I love the choice of denim for this style. Tres chic!
LikeLike
Interesting silhouette. I haven’t bought any of Paco’s patterns yet because the postage to Australia is way to expensive to justify the cost.. oh well-one day XD
LikeLike
Está preciosa Silvia, me encanta. El tejido es muy aparente para el modelo. Muchas gracias por la confianza depositada en mis patrones. Saludos desde Barcelona !!
LikeLike
I love the jacket. I have this pattern too and am glad to see the alterations you made. While I am heavier than you, a more fitted look will better on me. I had not thought of denim and love the look. This is the first time I have seen your blog and I will be adding it to my blog feed.
LikeLike
How wonderful! A casual but elegant jacket that you can wear lots and be proud of. 🙂 I’m itching to make another jacket this year, too, even though everytime I make one it exhausts me 🙂
LikeLike
What a cool jacket! I love that you made it in denim and figured out some alterations to improve the fit for you. I may need to try this pattern!
LikeLike
I LOVE this! It’s very flattering and you did such nice work on the details. I have been tempted by the pattern (:
LikeLike
What a beautiful jacket, and beautifully done, too! 🙂
I’ve never made a jacket – yet. For now, I think it’s the amount of work that needs to be put in, when I could work on my stash of fabrics-for-pretty-dresses. I think I’d like to make a blazer in the non-too-far future, though. Maybe with Gertie’s jacket class.
LikeLike