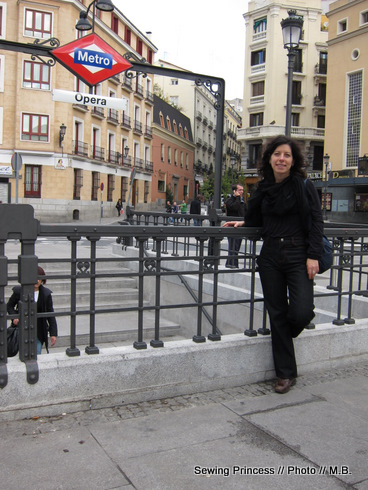
Finally I took pictures on my jeans endeavor. A weekend to visit friends in Madrid was the perfect occasion to take some pictures and show you another great European city. Hope you will enjoy this sewing and travel journey.
Finalmente ho fatto le foto dei miei jeans. Un weekend da amici a Madrid è stato l’occasione per fare foto e farvi vedere un´altra bellissima città europea. Spero che apprezzerete questo viaggio con cucito.

Sewing my own jeans has always seemed to me as challenging as sewing a wedding dress. However, jeans are much more versatile so I decided to give it a try.
What’s more, I always have a hard and frustrating time when buying jeans. That´s why I decided to turn to my lovely sewing machine
Cucire dei jeans mi è sempre sembrata un’impresa paragonabile a cucire un abito da sposa. Però i jeans si possono mettere più spesso così ho deciso di provarci.
E poi comprare i jeans è sempre stata un´impresa difficile e frustrante, così ho deciso di metter mano alla mia bella macchina da cucire.

That’s what happens to me when I take a pair off the rack in my size. They are generally:
1. Too tight around my thighs
2. My “derriere” looks too big
3. The pockets fall in the wrong place
4. Jeans are too wide around my waist
5. Jeans are too long (in Europe shop normally carry jeans with 32″ inseam) which means they are made for an overall longer body…not someone with shorter legs!
6. Even Levi’s are expensive, e.g. 150 USD, in Europe

Ecco cosa succede quando decido di provare dei jeans in un negozio:
1. Sono stretti alle cosce
2. Il posteriore sembra gigante
3. Le tasche cadono nel posto sbagliato
4. I jeans sono larghi in vita
5. Sono troppo lunghi (in Europa i negozi hanno i jeans solo con lunghezza 32″). Il che vuol dire che sono fatti per un corpo più lungo…non per qualcuno con le gambe corte!
6. I jeans sono costosi…oltre i 100 euro…anche quelli come i Levi’s che negli Stati Uniti costano pochissimo.
In the past I found a pair of jeans that fit, with 30″ inseam and I managed to buy two pairs…But I am dreading the moment I have to buy a new pair.
So, to cut a long story short…I ventured in the jeans territory. One more comment…I bought some cheap non-stretch denim for my first wearable muslin.

In passato ho trovato i jeans perfetti, con lunghezza 30″ e ne ho comprate due paia…ma temo il momento in cui dovrò comprarne degli altri.
Quindi eccomi qui a cucire i jeans. Ah, il tessuto che ho usato per questa prima prova non è stretch
These are some of the jeans tutorials I used:
Ho usato queste spiegazioni tutte in inglese. Se avete bisogno di aiuto per la traduzione fatemi sapere.:
Step by step instructions for assembling jeans: Jalie Jeans 2908
Another jeans step by step guide by Elegant Musings
Gaposis fix
Everyone Can Have Jeans that Fit by Threads
Pattern alterations
Sewing a Jeans Fly
Designing Stitch Patterns for Jeans Pockets
Jeans sew-along

Thanks to this wealth of information and help from my sewing instructor I managed to alter my pants sloper.
Grazie a queste informazioni e all’aiuto del mio insegnante sono riuscita a modificare il modello dei pantaloni per farne dei jeans
But I don´t want you to think everything went smoothly and it was a fast project.
So here is my debrief on the project:
- The project took me 2 weeks’ work in the evening and weekends.
- I used regular thread but chose a triple stitch on my machine. I didn´t have any threading problems but it makes stitching slower (as if you are sewing 3 times over the same seam)
- I used a jeans needle. No problems going over seams except the crotch area.
- Sewing two parallel seams was ok, except a less than perfect result in the front crotch area.
- I made my first flat-felled seams!
- I had to sew the buttonhole by hand as my machine was acting up
Però non voglio che pensiate che il tutto sia stato veloce e senza problemi. Quindi, ecco qui alcuni dettagli:
- Ci ho messo due settimane lavorandoci la sera e il fine settimana
- Ho usato del filo normale ma ho scelto il punto triplo sulla macchina. Quindi non ho avuto problemi per infilare il filo ma ci ho messo più tempo perché per ogni cucitura è come se cucissi 3 volte sullo stesso punto.
- Ho usato l’ago per jeans. Sono riuscita a passare sopra il tessuto senza problemi tranne nell’incrocio del cavallo.
- Cucire due righe parallele mi è riuscito abbastanza bene tranne in un punto del cavallo.
- Ho fatto le cuciture ripiegate per la prima volta!
- Ho cucito l’asola a mano perché la macchina faceva le bizze
- The fly zipper came out very well…thanks to this great tutorial Sewing a Jeans Fly. I went for cotton on the zipper guard to avoid extra bulk
- I basted tricky areas like the sides and pocket…yet I manage to make a mistake and had to disassemble it
- After having sewn the waistband I realized one side was off…I was really annoyed! And had to spend extra time to fix it.
- The pocket design is as planned…except I stitched the pockets the wrong way around! Thankfully the design is still ok!
- Oh yes, one more thing, up until I added the waistband there was no gaposis issue…so had to make a last-minute small dart and it was fixed.
- As for the pattern design, next time I will slighly lower the back crotch and the front waistline
- La lampo è venuta bene grazie alle spiegazioni su questo sito Sewing a Jeans Fly. Ho cucito la protezione della lampo in cotone per evitare eccessivo spessore.
- Ho imbastito le parti difficili come i fianchi e le tasche ma ho sbagliato e ho dovuto cucirle di nuovo
- Dopo aver cucito il cinturino mi sono resa conto che un lato era più alto…non potete immaginare i nervi e il tempo perso per risolvere la questione
- Il disegno delle tasche è come lo volevo tranne che ho invertito la posizione. Per fortuna il disegno va bene anche così!
- Fino a quando non ho aggiunto il cinturino la vita calzava perfettamente. Ma poi ho dovuto aggiungere una pince per sistemare il “buco” sulla schiena.
- La prossima volta voglio abbassare leggermente il cavallo posteriore e la vita anteriore
So, now my first jeans are done…and I am ready to tackle a new pair…after making a new winter coat.
What challenging project would you like to tackle sometime soon?
Ok finalmente il mio primo paio di jeans è fatto…ora sono pronta per il prossimo… ma prima voglio fare un cappotto.
Quale è il capo o oggetto complicato in cui vorreste cimentarvi?


Silvia – they are awesome! Well worth the trouble, in my opinion. I really like the contrasting colour you used for the stitching and the back pockets design. Also, the cotton facings give them tons of character. Thanks for the links to all the tutorials … I may be persuaded to try jeans sometime next year.
LikeLike
You look great in your new jeans. Love the pocket detail.
LikeLike
Fabulous jeans, especially for your first pair! Once you’ve made 20 pairs, they will seem easy, hehe.
I switch to a matching regular thread when doing the buttonhole. I finally realized it doesn’t REALLY need to be topstitching thread!
LikeLike
jeje belli questi jeans, sono venuti veramente bene, i disegni sulle tasche posteriori mi piacciono tanto:-)!!!
LikeLike
These look great! Good for you for taking the time with everything — a really great first pair. I bet you’ll wear them lots!
LikeLike
Pretty! I love the red topstitching and the pocket linings! And the fly looks superb! I think I’ll have to venture into jeans territory sometime this winter, too…
LikeLike
You’re right, Levi’s are very expensive in Europe. And even though they all make 32 inseam long jeans, they’re all too short for me. It’s frustrating!
I love the red stitching.
LikeLike